

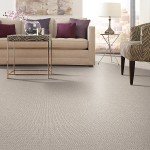


When it comes to home décor, carpeted stairs are a classic choice that offer both style and functionality. Not only do they add a soft and comfortable surface for your feet, but they can also help reduce noise and protect your stairs from wear and tear. However, before you install stair carpet in your home, it's important to consider the pros and cons and learn about the installation process to ensure that it is the right choice for you.
Pros of Stair Carpet
- Safety: Carpeted stairs can be
safer than bare ones, as the textured surface provides better traction,
reducing the risk of slips and falls.
- Comfort: Carpeted stairs provide
a soft and cushioned surface that is more comfortable underfoot than
hardwood or tile.
- Noise Reduction: Carpeted stairs
can help reduce noise from foot traffic, making it a great option for
families with young children or pets.
- Variety: Carpeted stairs come in
a variety of colors and patterns, giving you the flexibility to choose a
design that complements your home décor.
Cons of Stair Carpet
- Maintenance: Carpeted stairs
require regular vacuuming and cleaning to keep them looking their best.
- Wear and Tear: Carpeted stairs
can wear out faster than hardwood or tile stairs, especially in
high-traffic areas.
- Allergens: Carpeted stairs can
trap dust, dirt, and allergens, making it difficult for people with
allergies or respiratory problems.
- Installation: Installing stair
carpet can be a challenging process, requiring precise measurements and
specialized tools.
Installation Process
Step 1: Measure the Stairs
Before you
begin installing carpet on your stairs, you'll need to take accurate
measurements to ensure that you have enough carpet material. Measure the length
and width of each stair tread, making sure to add an extra 3-4 inches on all
sides for trimming.
Step 2: Prepare the Stairs
To prepare
the stairs for carpet installation, remove any existing carpet or tack strips.
Sand down any rough spots or glue residue and repair any loose or damaged
treads.
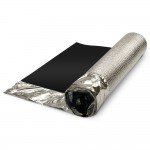
Step 3: Install Padding
The next
step is to install padding on each stair tread to provide a cushioned base for
the carpet. Cut the padding to size and secure it to the stair treads with
staples or adhesive.
Step 4: Cut the Carpet
Using the
measurements you took earlier, cut the carpet to the correct size for each
stair tread. Use a utility knife or carpet cutter to trim the edges as needed.
Step 5: Install the Carpet
Starting at
the top of the stairs, lay the carpet over the padding, making sure it is
centered and straight. Use a knee kicker and carpet stretcher to stretch the
carpet tightly over each stair tread, securing it with staples or adhesive. Repeat
this process for each stair tread, trimming the edges as needed.
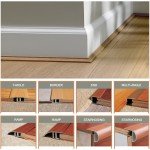
Step 6: Finish the Edges
Once all of
the stair treads are covered, finish the edges with carpet tape or trim to
create a clean, finished look.
Conclusion
Stair carpet
can be a great addition to any home, offering both comfort and style. However,
before you decide to install carpet on your stairs, it's important to weigh the
pros and cons and learn about the installation process. By following these
step-by-step instructions, you can ensure a successful installation that will
provide years of comfort and beauty for your home.