


Vinyl plank flooring is a popular choice for many homeowners
due to its durability, affordability, and ease of installation. It can be a
great option for anyone looking to update their flooring without breaking the
bank. However, before you jump into installing your new vinyl plank flooring,
it’s important to understand the process and ensure you have the right tools
and materials on hand. In this article, we’ll provide a step-by-step guide on
how to install vinyl plank flooring, with an expert perspective from
professional installers.
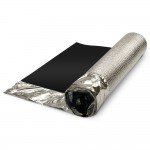
Step 1: Preparation
Before you begin installing your vinyl plank flooring, you’ll
need to prepare the room. Remove any furniture or obstacles from the space, and
ensure the subfloor is clean, level, and free of any debris. If necessary, use
a leveling compound to even out any low spots in the subfloor.
It’s also important to acclimate your vinyl plank flooring to
the room’s temperature and humidity for at least 48 hours before installation.
This will help prevent any warping or buckling of the planks down the line.
Step 2: Measure and Cut
Once your room is prepped, it’s time to measure and cut your
vinyl plank flooring. Measure the length and width of the room, and then
multiply those numbers to determine the total square footage of flooring
needed. Add an extra 10% to account for waste.
Using a straight edge and utility knife, carefully cut your
vinyl plank flooring to size. Be sure to leave a ¼ inch gap between the planks
and the wall to allow for expansion.
Step 3: Lay the First Row
Starting in the corner of the room, lay your first row of
vinyl plank flooring with the tongue side facing the wall. Use spacers to
maintain the ¼ inch gap between the planks and the wall.
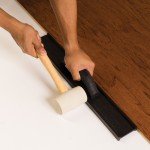
As you lay each plank, connect the tongue and groove edges
together until you reach the end of the row. Use a tapping block to ensure each
plank is snugly fitted together.
Step 4: Continue Laying the Planks
Once you’ve completed the first row, continue laying the
planks in the same direction as the first row, keeping the ¼ inch gap along the
edges. Be sure to stagger the seams of each plank to create a more
natural-looking pattern.
Step 5: Cut Planks as Needed
As you work your way across the room, you’ll likely need to
cut some planks to fit around obstacles like doorways or cabinets. Measure each
plank carefully and use a jigsaw or circular saw to make the necessary cuts.
Step 6: Install the Final Row
As you near the end of the room, you may need to cut the
final row of planks to fit. Be sure to leave a ¼ inch gap between the planks
and the wall.
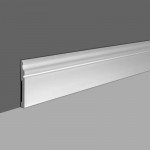
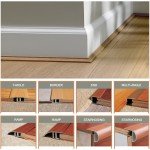
Step 7: Install the Baseboards and Trim
Once your vinyl plank flooring is installed, it’s time to
install the baseboards and trim. Use a nail gun or adhesive to secure the trim
in place, making sure to cover the ¼ inch gap around the edges of the room.
Installing vinyl plank flooring can be a relatively easy and
affordable project with the right tools and preparation. It’s important to take
your time and follow the steps carefully to ensure a successful installation.
By doing so, you can enjoy a beautiful and durable new floor in no time.